Bean There, Done That: Favas Part 2

Foray into Favas: a Two-Part Blog
Meet the Bean: Vicia Faba 
Part 1.
I am trying out fava beans (Vicia Faba) from scratch for the first time! Fussy little beans, I’d say. First you need to shell them. Not quite like shelling peas, with a simple crack of the pod and the thumb-slide to release the peas – favas seem to require a bit more wrestling, and then once you get them shelled, they need to be hand-peeled. Every bean. Seriously.
Every.
Bean.
By.
Hand.

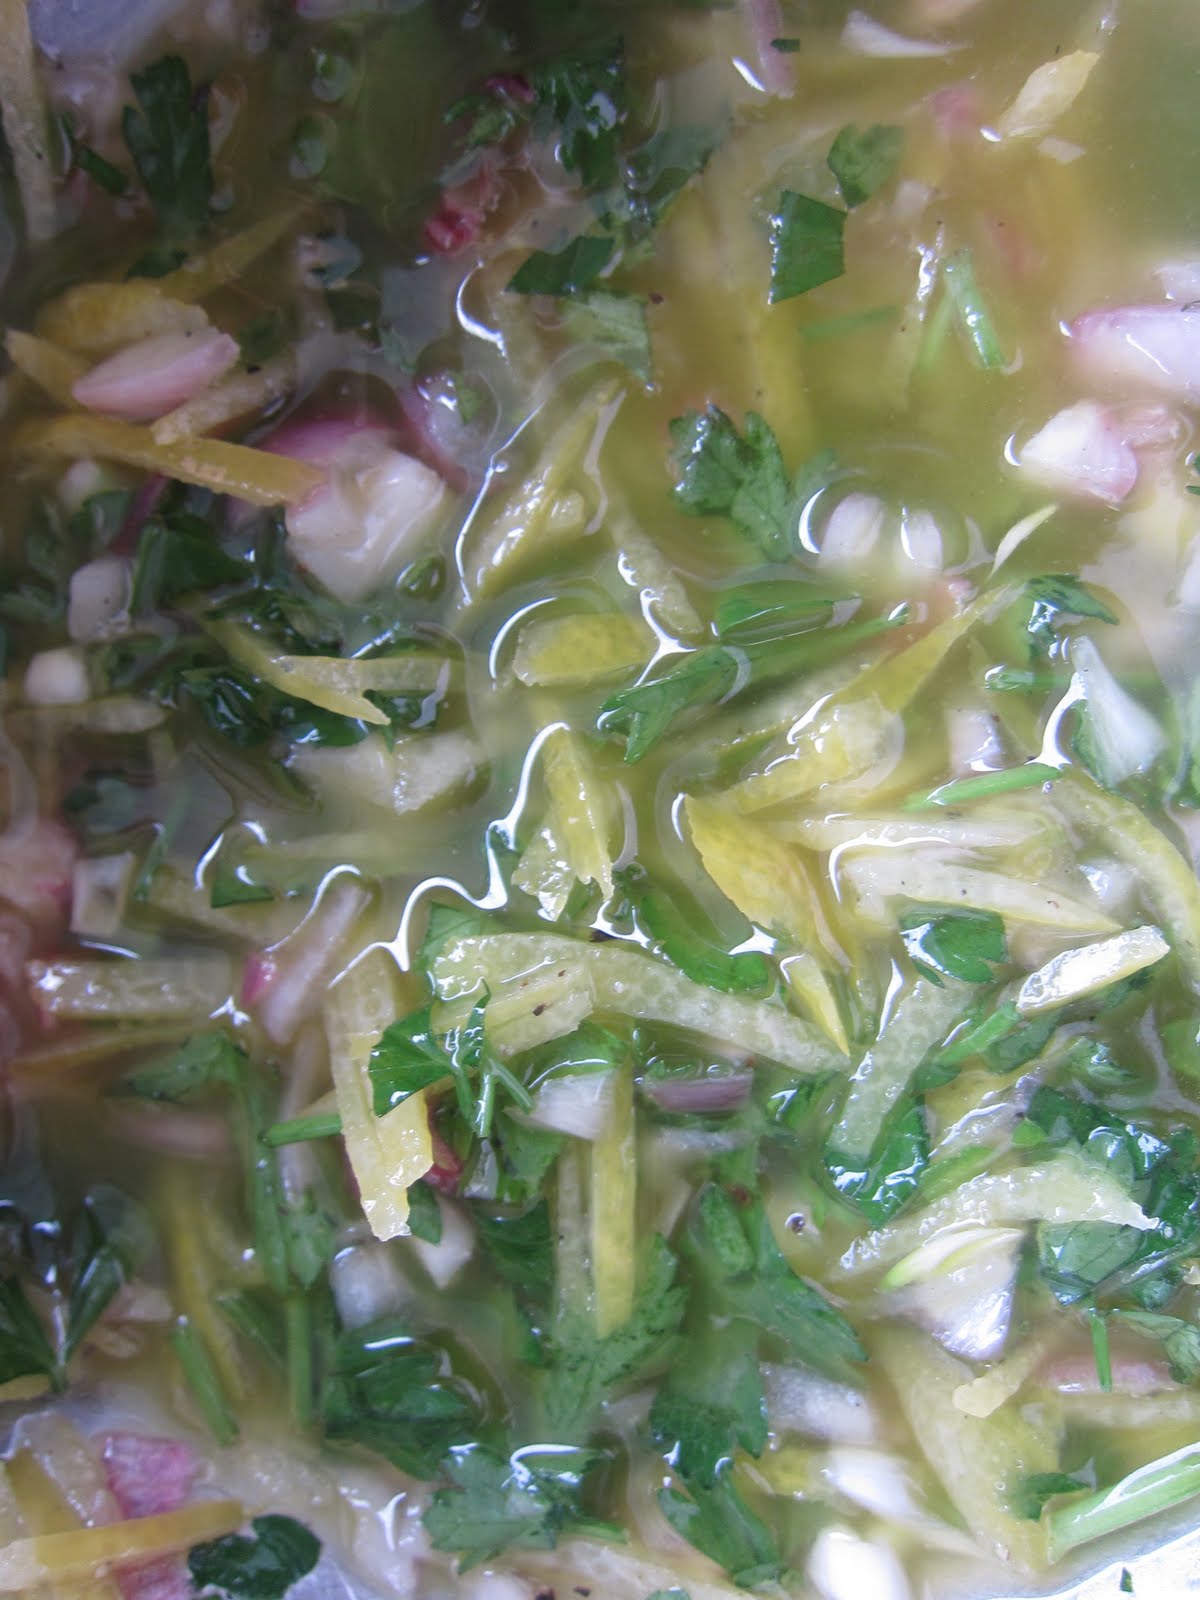
Favas: just shelled.

Luckily, despite the size of the pods, the bean yield – from a great big bag – is pretty small. Of course, once you peel them (a complicated, delicate process involving a quick boil, an even quicker cool and a poke and peel method that requires a high degree of manual dexterity – these babies are slippery!) the yield is even smaller. *SIGH* Don’t get me wrong. I love my legumes, but favas are high maintenance. A bean beyond, you might say.

Naked favas. Worth the effort?

I’m making an upscale version of ‘Pork n’ Beans’, a childhood standby and a summer staple as far as I’m concerned. One of my all-time favourite summer meals is potatoes and onions  baked in foil in the campfire, steak grilled over same, and cold canned beans on the side. Flying ash from the firepit as garnish! Oh well.

Since I’m eating clean these days, the uber-convenient can o’ beans is way off the list (not to mention potatoes and flyash) so I decided to whip up my own creation.

The plan:Fresh favas from the Farmers Market, simmered with the bone from leftover pork roast (organic, natch) then sautéed with onions and garlic (lots of garlic). Add basil and thyme from the garden and fresh diced tomatoes. A bit more simmering…et voila!

The outcome: 
Stay tuned for Part 2. I’m wiped from the shelling and peeling. I’m putting the batch together later.
Post-nap.

To find out more about Vicia Faba click the link.

Sufferin’ Succotash! 
These Beans Rock. 
Part 2.

Results: Yummy.

A bit more like high-end succotash, than my fondly remembered P&Bs, the favas simmered in the pork broth, flavoured up with garlic, onions, tomatoes, thyme, bay leaf and basil were really delicious. I added diced pork (from the leftover roast) and also diced up some leftover roast squash – a nice hit of creamy sweetness that really complimented the beans. The beans? A lot of effort, but worth it.

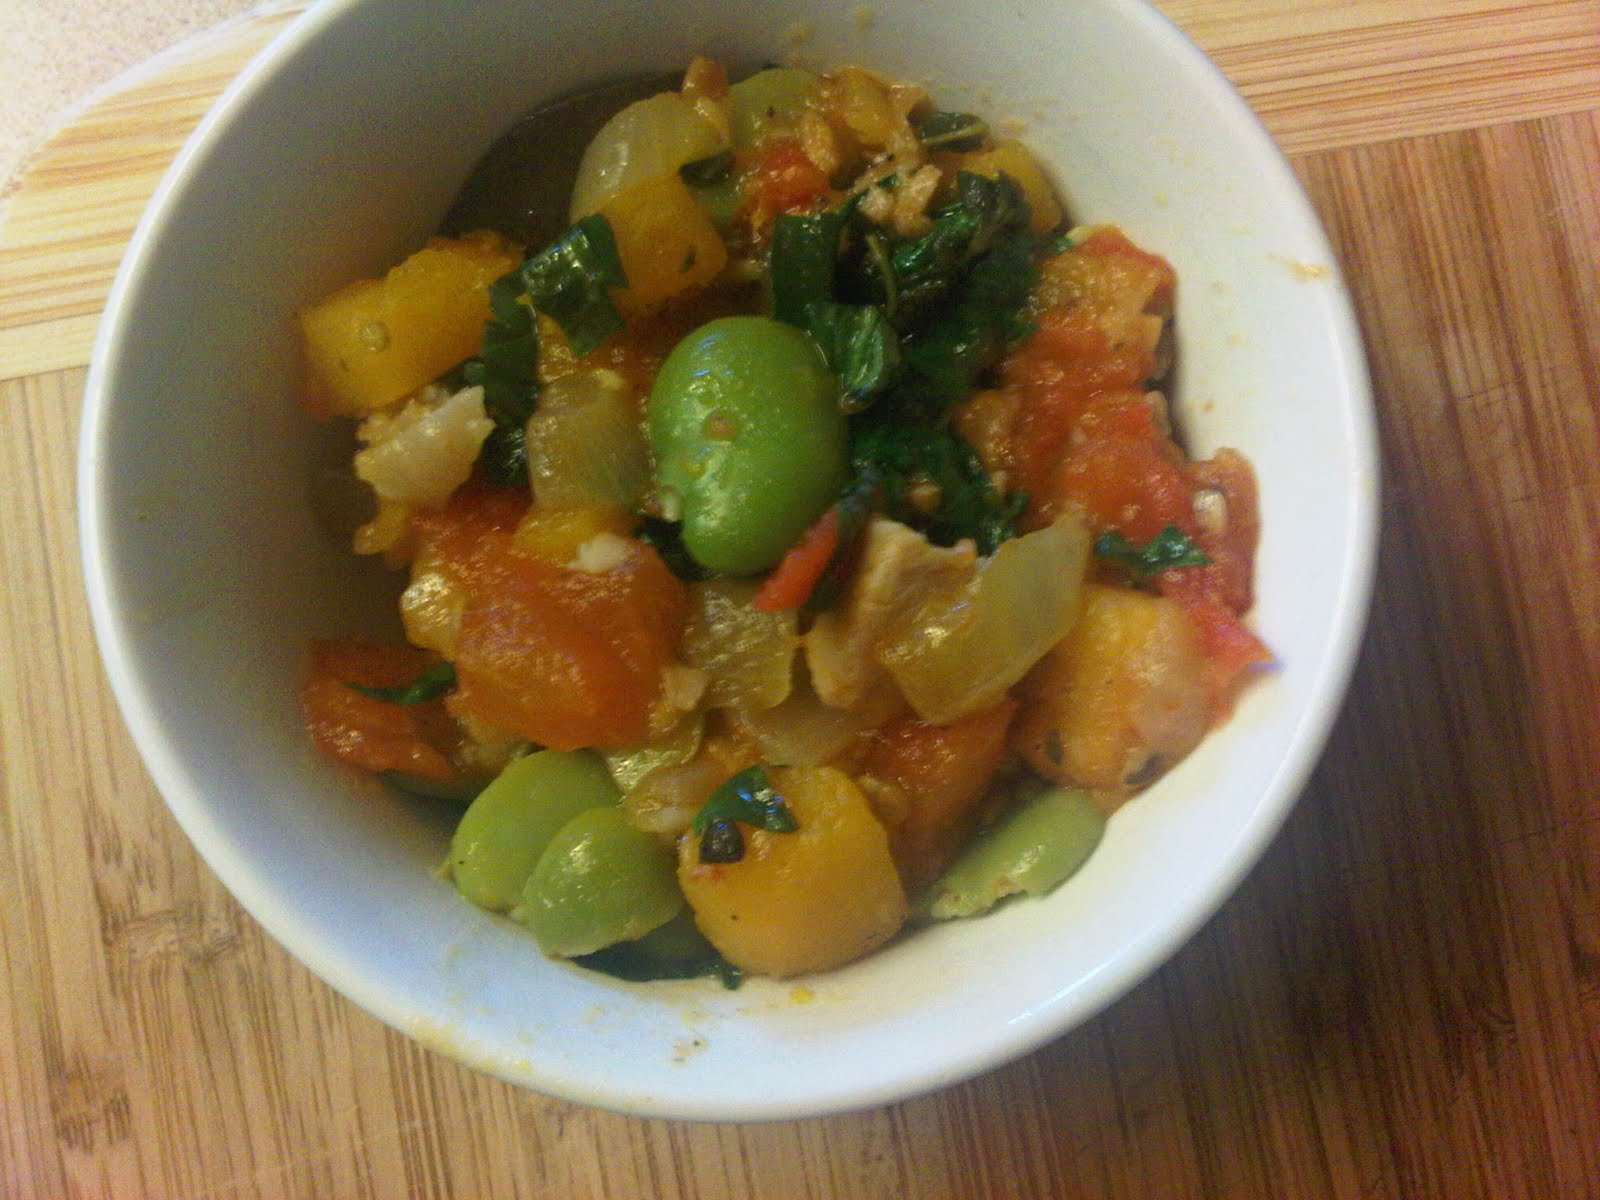
Favas fully dressed. Worth it. This time.

Would I do favas from scratch again? Hmmm. Hard to say. I really love them, but I have a feeling they’ll fall into the same category as roast duck – one of my faves, and just too fussy for me to make at home.

Perfect, though, for ordering in restaurant. And one thing I know I can make is reservations!

It’s bean fun. I’d love to hear your fava stories!

Side note:
These beans travel well and taste great cold (just like the ol’ canned ones). We had the leftovers at a picnic in the local park today. Hubby and I both longed for more…

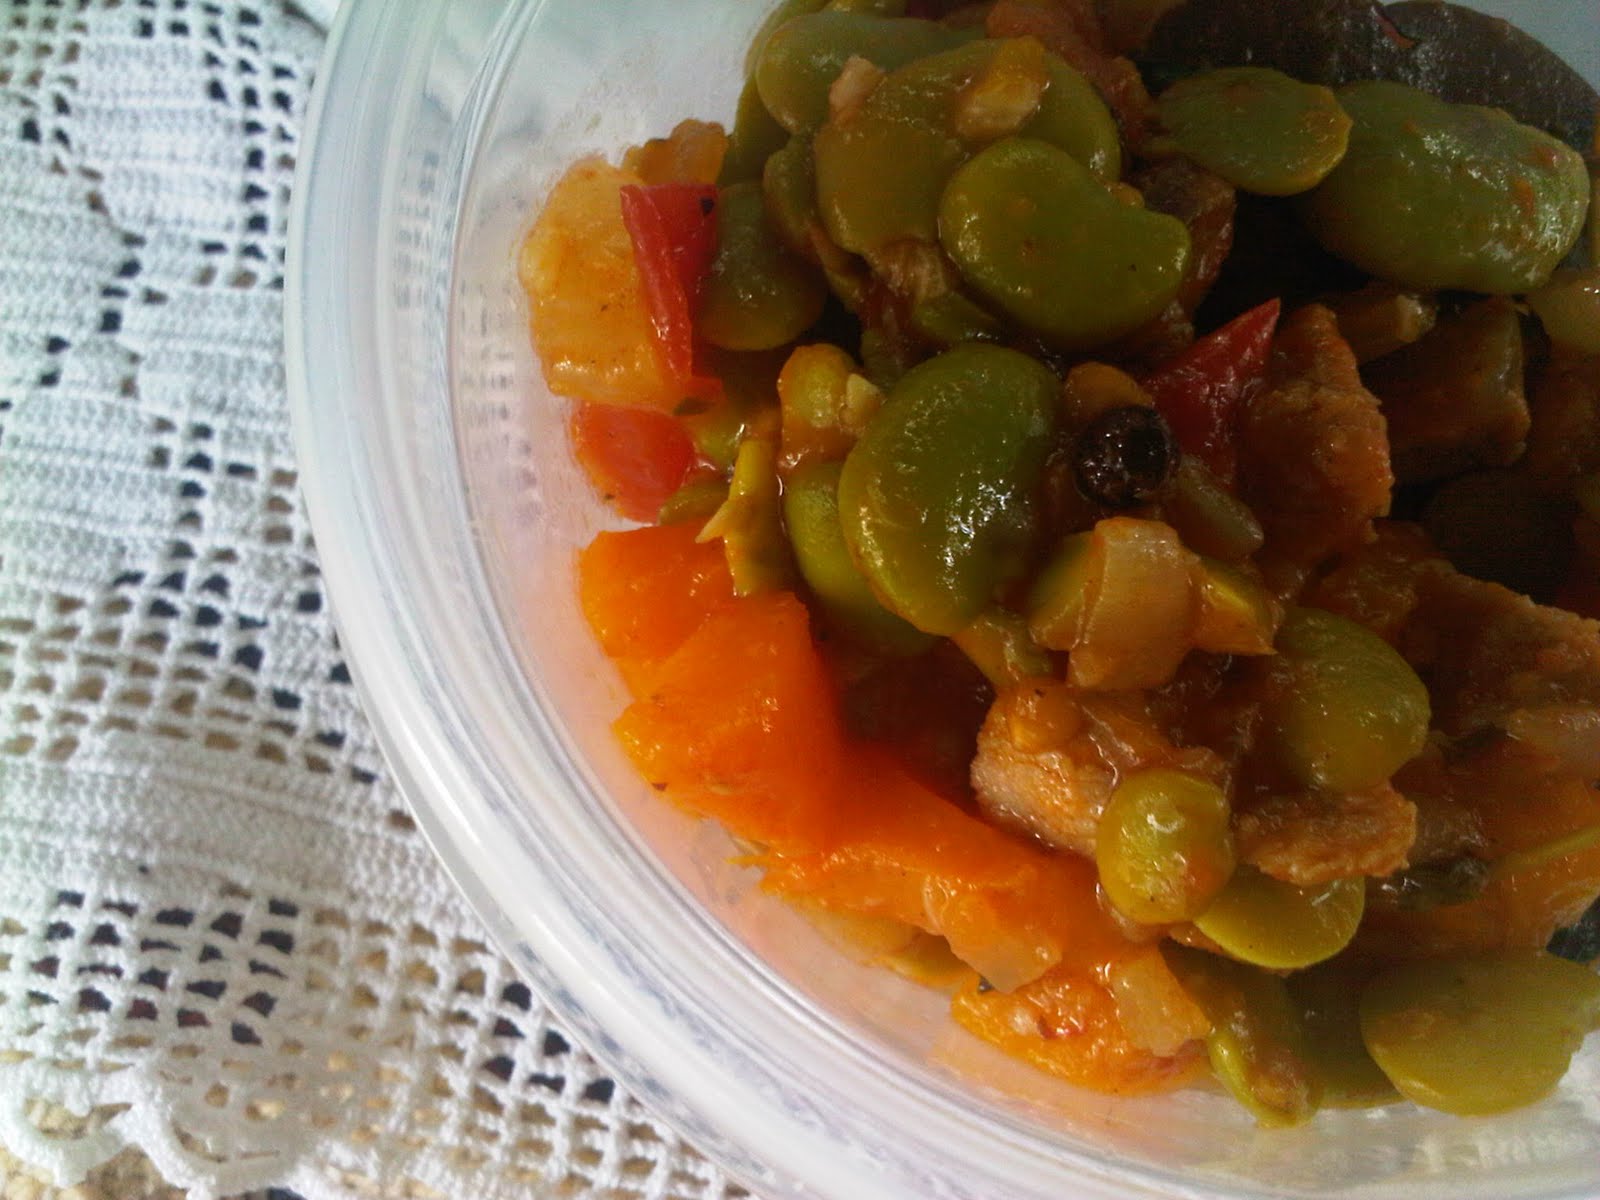
Favas on a picnic. Have tupperware. Will travel.


Must Love Peas

Beautiful pea shoots from Mission, BC.

I am a big fan of happy collisions, and one of the summer’s best is the collision of halibut season and pea season.

Yes, it is that time of year. Peas planted in the March cold are sweet and ripe and halibut is plentiful.

I’m convinced that the arrival of both of these delicious foodstuffs is part of a grand cosmic scheme to inspire fine dining chock-full of healthy goodness. (The food gods do want us to be healthy and happy!)

Last week hubby and I (another happy collision!) collaborated on a made-in-July summer dinner inspired by a find of fresh pea-shoots at the local Farmer’s Market. Not only that, my sadly neglected June issue of Bon Appetit magazine just happened to feature a mouthwatering recipe featuring peas, pea shoots, and halibut. Spooky, I know. Another collision.

My fresh peas (and some back-up frozen ones) make a happy addition  to the pea & spinach puree

The dish starts out with a puree of peas and spinach. A super-healthy combination that comes out a rich, deep green. Fresh peas – which I just happen to have in my very own funny little garden – are added, and at the last, as the halibut is grilling, fresh pea shoots are wilted into the puree. (On points, I’d probably omit this last step and just serve the pea shoots fresh on the side. They seemed to give the puree a certain ‘weediness’, and they are so pert and delicious on their own).

Halibut on the grill. OMG.

A mixture of finely sliced lemon rind, shallots, parsley (from the garden too!) and olive oil makes a kind of a gremolata/salsa to top the fish that gives it a real boost. There is this bright, fresh pea puree taste combined with the buttery-smoky halibut, and then the sparkly sharp lemony salsa kick. Yummy.

Salsa-y gremolata tops the fish. Oh my.
This meal is elegant, summery and uber-healthy. Plus clean. Yes, I am still on my cleanse (ten weeks and counting!) and this dish alone could convince me to stick with it.  Of course, you must love peas. Which I do. 

Peas and halibut – so happy together… 

Celebrating Clean Food 7 Ways

Seven weeks and counting! Yes – that’s right, seven weeks of clean eating … and to celebrate my radical change of diet and my awesome commitment to being good to myself, here are some of my favourite dishes (so far).  These are in no particular order, and I invite you to celebrate and salivate… and, well, maybe get inspired to try experimenting with a few of these yourself. Basically I made these dishes up based on what I am and what I’m not eating these days. And I’m basically not eating wheat, carbs, dairy (‘cept yogurt and goats milk products) sugar – or any sweeteners, no fruit, vinegars, or anything fermented. And also no black tea or coffee. What are the yeses? Veggies and lots of ’em. Lean meats and fish. Some legumes. Brown rice and quinoa. Call it my own personal Cooking Challenge.

First up – eggplant lasagne. OMG.

1. This is made without pasta using super thinly-sliced eggplant (I use a mandoline) done 3 ways – brushed with olive oil and grilled,  dipped in eggwash and breaded with brown rice flour and sauteed, and sauteed in a plain eggwash. A fab trio – I was experimenting with all three. You could just use any one method, although for simplicity – grilled.  I used crumbled tofu with lots of garlic, shallots and fresh basil mixed with an egg as a replacement for the ricotta, and added a layer of fresh basil leaves. It is topped with grated goat mozarella. The sauce came from an organic sugar free brand that I jazzed up with ground sundried tomtoes, pine nuts, basil and garlic. In the background: romaine lettuces awaiting grilling. To be topped with homemade ceasar salad dressing and capers. This salad is almost famous.

Double-Double Garlic Choy Tofu

2. I use sauteed garlic, garlic stems or scapes (and brown ’em up for extra zing!) along with baby sui-choy and baby bok choy in this easy dish. Perfect for  a busy weeknight. The secret is to use sesame oil for the sauteeing and add a splash of Braggs at the end. You can also add asparagus or green beans for extra veg.

Quinoa, sundried tomatoes & goat feta side or salad

3. I am ardently attached to quinoa – this is just one of the many ways I love it. You can cook this up warm as a main or side dish and serve the leftovers up the next day as a salad. (What am I saying? Assuming there are any leftovers!)

Chili with greek yogurt and cilantro topping.

4. What can you say about chili? Handy, versatile, freezes beautifully, loved by most. Keep it clean. In this version I used organic ingredients and only sugar free tomatoes, tomatoe paste and beans. My cleanse includes lean beef, and you can also use ground turkey or crumbled tofu.

Radicchio Rolls and Italian Chicken

5. This was a knockout meal. Radicchio rolls are made just like cabbage rolls. My clean version is stuffed with cooked brown rice, fried onions and smoked tofu. Topped with home-made olive oil mayonnaise and baked.  The Italian Chicken is an adaptation of John Bishop’s Terracotta Chicken recipe. Chicken thighs are dredged with a brown rice/arrowroot flour mixture, browned and then baked in a tomatoe sauce (see Eggplant Lasgagne) topped with goat mozarella and garnished with fresh basil.

Sauteed Red Snapper with Yellow Lentil Stew and Carmelized Onions

6. Another mouthwatering combo. The lentil stew is one of my hubby’s specialties – and also freezes beautifully. It is made with yellow lentils, organic chicken broth and lots of lemon. The carmelized onions are are beautiful sweet, zingy counterpoint and the cilantro a great match to the fresh, comforting stew. The snapper is dredged in seasoned arrowroot flour and pan-fried in olive oil and butter. (Yes, I can have butter…*smack*)

Pepper + Goat Cheese Stuffed Omelette, Red Tomatoe Salad, Smoked Tofu

7. Brunch anyone? This special Sunday meal was inspired by the local Farmer’s Market. Fresh eggs and bountiful hothouse peppers were the basis for the omelette, with vine-ripened baby red tomatoes and basil as a sparkling side. Smoked tofu added a little extra protein and that Sunday brunch taste.  Yum.

And as an added bonus, here are a couple of my favourite “foodcessories”:

Fresh tomatoe, red onions, basil, olive oil. Is there more? Oh yes, fresh pepper!
Olives – any kind, all kinds. As a side or baked in almost any kind of mediterranean main. And homemade mayo, aioli, dressing…this one is a garlic/dijon base. You can put this stuff on almost any salad, veg or meat. Great as a dip, too. 

So, happy clean cooking. After seven weeks I’m convinced I can serve up creative, delicious, satisfying meals that are healthy, organic and free of fillers. And how do I feel? Amazingly good. And virtuous. Really, really virtuous.

Here are a couple of my inspirations:

http://www.bishopsonline.com/
http://www.jamieoliver.com/books


Have fun!

Aunty O’Valerie’s Soda Bread

Yes, April is well upon us and I haven’t posted the new Recipe of the Month (ROM) yet! I’m quickly reposting the March recipe and then saving it with the ROM tag, so you can always find it if you want (and really, you should want it – it’s fab!) April’s Asparagus will be next!

Aunty Val’s Irish Soda Bread

Aunty O’Valerie. (Not exactly as pictured)


This bread is a breeze to make and is an absolute must-have with homemade soups and stews. I recently served it warm from the oven alongside vegetarian chili to my visiting nieces and it was a hit. The girls eagerly tore into it – (girls after my own heart *sigh*) – and wisely preferred it to a store bought olive bread also on offer (no surprise to me. Ahem.).


This is one of my dear Aunty O’Valerie’s stand-by recipes and has become one of mine, too –  as have so many of her recipes. I offer it to you just in time for St. Patrick’s Day!

2 c whole wheat flour

2 c white flour

1 tsp baking soda

1/2 tsp salt

2 c buttermilk

1 egg

1-2 Tbsp sugar

1/4 c oil (canola)

Sift dry ingredients together. Mix in wet. Shape dough into an oval on a greased baking sheet (the dough will be sticky so use flour on your hands). Slightly score the top. Bake at 300 degrees F for 1 hour in the middle of the oven.

This recipe can be successfully doubled – just be sure to use two baking sheets. 

Soda Bread (pretty much as pictured)

Asparagus!

This amazing pic is by Jenn Co-McMillan at Alchemy Photographic Arts.
Check out her work on her blog 365 Days of Alchemy (on my list).

This post is dedicated to Lisa S, for her perseverance, foodiness, and generally being a good sport. She has hounded me (in the good way) for this recipe. I think it is a perfect one to launch spring – and yes – you know what that means: ASPARAGUS SEASON.

Asparagus is my one weakness (ahem) and this is my favourite way to serve it. This recipe is from the amazing Diane Clements of The Tomato Cafe restaurant fame (among other things – like being an Olympian!)

Asparagus Nicoise Salad

Asparagus
Tomatoes
Nicoise or calamata olives
Capers

Dressing:
3 T red wine vinegar
2 t Dijon mustard
2/3 c olive oil
salt + freshly ground pepper to taste

Trim and cook asparagus until just al dente. Plunge into an ice bath to prevent continued cooking.
Drain and lay out on paper towelling to absorb any moisture. (at this point it can be refrigerated until later or even overnight)
Whisk together vinegar and mustard, add olive oil and mix well. S + P to taste.
Seed and chop 2-4 ripe tomatoes
When ready to serve lay out asparagus on a pretty platter, spread chopped tomatoes, 1/2 c olives (drained) and 2 T of capers on top of asparagus. Drizzle salad dressing over all or pass dressing at the table.

Et Voila!

Bread and Jam – er, Clams.

In most excellent news, The Preserving Kettle canning classes are continuing throughout spring, summer and fall (YES!) so I will be bringing you ongoing blogs about jam, jellies and a host of preserving possibilities. It’s a tough job, I know. But I’m willing. Such a trooper.  You could say I’ve got jam.

In the meantime, I promised to blog a bit about bread. I posted one of my favourite quick bread recipes as the ROM for March, and promise to post my best-ever French bread recipe, as an homage to my infatuation with all things francaise. HOWEVER.

captivating Calabrese!

Let me startle and amaze you by recommending a store-bought loaf. Yes, I did say store-bought. This is beautiful crispy-on-the-outside, soft-and-tender-on-the-inside Calabrese white from the local Save-On Foods. Yum. I served it alongside a platter of steamed clams that four of us DEMOLISHED as an appetizer. Sadly, not a clam left standing.

Steamed Clams* (legs hidden) with Chorizo

The Calabrese was the perfect dipping bread – spongy enough to suck up all that delicious wine-infused clam broth and strong enough to do the job. Incidentally, one of the best recipes for steamed clams EVAH, courtesy of the fine chefs at Northview Golf and Country Club in Surrey BC. If I share it with you I will have to kill you.

(No, seriously – I will be posting it in April – this one definitely deserves Recipe-of-the-Month status).

*My family has an ongoing joke about clams, provoked by Johnny Hart’s series of BC cartoons about clams published in the seventies. Still can’t talk about them, serve them, dig them or think about them without chuckling. Enjoy!

Marvellous Marmalade: A Cure for the Winter Blues

Yes, I know I promised that I would blog about bread – and I have (in a way) – by posting Aunty O’Valerie’s Irish Soda Bread recipe as the Recipe of the Month. Which is soooo totally appropriate for March –  yes?

Agreed, then. BUT. Just one thing.

Before we get to blogging about bread there is a foundation that needs to be put in place.

Yes. Jam.

That’s what I’m saying. We can’t even begin to talk about bread without jamming about jam. (Well, marmalade to be precise!) For, after all, what is bread without jam? Nekkid. That’s what. Of course there is BUTTER. (Thanks for pointing that out.) And it is true that I could easily devote an entire post to the virtues of butter, but for now it is jam that will carry the day.

Last week, I attended a marmalade-making class. Seriously. Can you imagine my happiness when I received a flyer from the local Community Kitchens coordinator (none other than my dear friend, Cie, she of previous blog posts about brunch) promoting local preserving workshops? What luck!

Cie, along with the amazing Kathy Marven (a marvel) of de la Bouche Specialty Foods have teamed up to offer three canning workshops this spring: Marmalade, Winter Chutnies, and Spring Jams. My oh my. Needless to say (but I’ll say it anyway) I’m signed up for all three. Apron and camera in tow.

The class was one of the best things I’ve done all year. Cie and Kathy talked about the history of marmalade and the Seville orange trade – (Sevilles in season now, btw) and then Kathy demonstrated the method and technique of making a sparklingly beautiful Pink Grapefruit Marmalade. 

Outside, it was a filthy night. Inside, we snugly circled the demo table while the preserving kettle bubbled away on the community stove and the tang of citrus stung the air. We passed around odd-looking peeling and preserving tools, taste-tested oranges and lemons and conspiratorially swapped favourite canning stories as though trading national secrets.

We finished with the Great Marmalade Taste-Off. We compared the evening’s batch with two or three of Kathy’s other specialties and a couple of store-bought brands. Hands-down winner? You guessed it.

And we each went home, fully contented, with our own jar.  A perfect pink cure for the winter blues.

Next up? Toast and jam. In my jammies.

To find out more about Community Kitchens, click on the link.


de la Bouche Specialty Foods can be found at the Haney Farmer’s Market (May-October) or via email: delabouche@telus.net

Seville Oranges are VERY SOUR.


Attention Blog Readers:  Would you like to follow or comment on this blog? Visit my new page How to Comment and there you will find instructions for setting up a google identity. Cheers!

Recipe of the Month – February


This was the February Recipe of the Month which I will leave posted here for  a couple of days, and then it can be found under ROM in the tag cloud. In March, we’ll celebrate bread…oh, yes!
Contented in the kitchen.
BROWN SUGAR AND YOGURT PANNA COTTA

This is one of my company faves. Easy to make and it has to be made early in order to set, so dessert is out of the way even before you start on any other dinner party details, and it never fails!

As Karen Barnaby says, who published this recipe in the Vancouver Sun, it doesn’t require a lot of precise mixing, measuring or icing. I use almost any kind of fresh berry to garnish this with – and peaches are awesome, too – and I always drizzle a little balsamic reduction over the fresh fruit. It is light, creamy and a perfect ending to any dinner. And, yes, since you asked – I have been known to have it leftover for breakfast!

4 tablespoons (60 mL) water
21/2 teaspoons (12 mL) gelatin
11/2 cups (375 mL) whipping cream
1/2 cup (125 mL) brown sugar
11/2 cups (375 mL) plain yogurt
1 teaspoon (5 mL) pure vanilla extract
1 pint (500 mL) fresh sliced strawberries or other fruit for garnishing

Place the water in a small bowl and sprinkle the gelatin over the top. Let stand until softened.
Combine the cream and brown sugar in a large pot to prevent boiling over pot. Bring to a boil, add the gelatin and remove from the heat. Stir until the gelatin dissolves. Place the yogurt and vanilla in a large bowl and whisk in the cream mixture.

Pour evenly into 6, 4 to 5 ounce ramekins, dessert dishes or wine glasses. Place in the fridge and chill until set, approximately 4 hours. To serve if using the ramekins, place the ramekins in hot water for 30 seconds. Run a very thin knife around the inside of each and place a plate over the top. Turn upside down and vigorously shake the ramekin while holding the plate securely. The panna cotta will fall out on to the plate. (I rarely do this, I usually just serve it in the ramekin, fruit and balsamic on top, with a nice shiny spoon!) If you’re using a wine glass or dessert dishes you don’t have to remove the panna cotta. Garnish with the fruit.
Makes 6 servings

No pictures of this one, so you’ll just have to imagine it, but imagine it DELICIOUS.

(PS – I think it looks like Mother and Jane are making panna cotta in the illustration. Bake, Jane, bake.)

Favourite Re-runs: Caramel Pecan Tart

This is a recipe I published some time ago, when I started my Recipes page. Today, messing around with my blog, I realized that the Recipe page is static – I don’t now how to add additional recipes to it, so I am changing it into a Recipe of the Month (ROM) page and I will transfer the ‘old’ ROM to the main post when I change them up. That way, you won’t miss one delicious morsel.
Caramel Pecan Tart
from Chez Piggy

Crust:
1/3c + 2T unsalted butter
1-1/4c flour
5T sugar
2 egg yolks
Filling:
2/3c packed brown sugar
1/4c unsalted butter
1/4c golden corn syrup
2c coarsely chopped toasted pecans
3T whipping cream
Preheat oven to 375 F. Crust: Line the bottom of a 9-inch tart pan with parchment paper (cut to fit). Cut butter into flour and sugar until it forms pea-sized chunks. Add egg yolks and mix until pastry just begins to cling together. Press into the bottom and sides of the tart pan, to 1/4 inch thickness. Prick crust all over with fork and bake for 12 minutes. Cool.
Filling: Combine brown sugar, butter and corn syrup in a large saucepan. Bring to a boil. Turn off heat, stir in pecans and cream. Lightly press into cooled crust. Bake at 375 F for 12 minutes. Let cool. Serve in thin wedges (It is really rich, *swoon*).
I love to serve this topped with a dollop of whipped cream flavoured with almond extract. Mmmmmm.

Best Ever Roast Chicken

Oh yes! This is the best ever roast chicken. Not only did I start with a plump, beautiful organic bird from Rusty Gate Farm in the Comox Valley, I used a foolproof Jamie Oliver recipe to roast this mouthwatering fowl. Along with being easy and delicious, I got to use some of the hardy herbs that are battling their way through November and hanging sturdily on in my garden. In this case, thyme and rosemary (I have to admit, rosemary is my favourite garden herb – don’t tell the parsely!)

(Uncooked chickens always look so naked & chilly.
I want to cover their little thighs with my oven mitts!)
The recipe was so simple and the result so tasty. Juicy. Rich. Chicken-y. Jamie Oliver offers brilliant cookery advice – his recipes really are my one weakness. Is it his mischevious boyish twinkle? The great hair that curls this way and that? His “Aw-shucks, luv, anybody can do this” handsome way about the kitchen and garden? Well, of course!

And his recipes are just plain good. I think he is a maestro of roll-up-your-sleeves cooking with an unerring instinct for flavour-matching. I’ve never had a recipe of his fail. His cookbooks are pleasure to read, filled with great tips and wonderful pictures. And he is on a mission to promote fresh real food. Plus he is boyishly good-looking.

I served the chicken for Sunday dinner and there were plenty of leftovers for the rest of the week. (Such joy!) The organic roasters are really savoury and generous. Speaking of generosity, my aunt purchased a quantity of birds and most generously passed one on to us. Needless to say, the next time I am in Courtenay BC, I will be finding my way to Rusty Gate to fill up my cooler and return the favour! Definitely worth a 4-hr trip for these bosomy beauties (I am, of course, speaking of the chickens).

In keeping with my rich fantasy life, I am already planning out my imaginary chicken coop. Eating Rusty Gate poultry has given me an aspirational goal for hen-keeping – even the pretend version.

I served our roast chicken with a side of oven-roasted rutabaga, brussels sprouts and pecans and a cranberry-almond couscous.  Lipsmackingly good. Like Jamie. (Did I menion how cute he is?)

http://www.jamieoliver.com/recipes/chicken-recipes/perfect-roast-chicken